Take a Photo
The Take a Photo feature allows you to capture images directly using your camera. The system will automatically detect text in the image (OCR), then summarize, extract, or generate smart notes using AI.
Key Benefits:
- Quickly capture text-based content such as slides, whiteboards, or handwritten notes
- Instant text recognition and analysis after each capture
- Supports up to 10 photos per session
- Customizable summary styles and writing tones
- Simple, intuitive interface with a seamless "capture – save – process" flow
1. UI/UX Specification
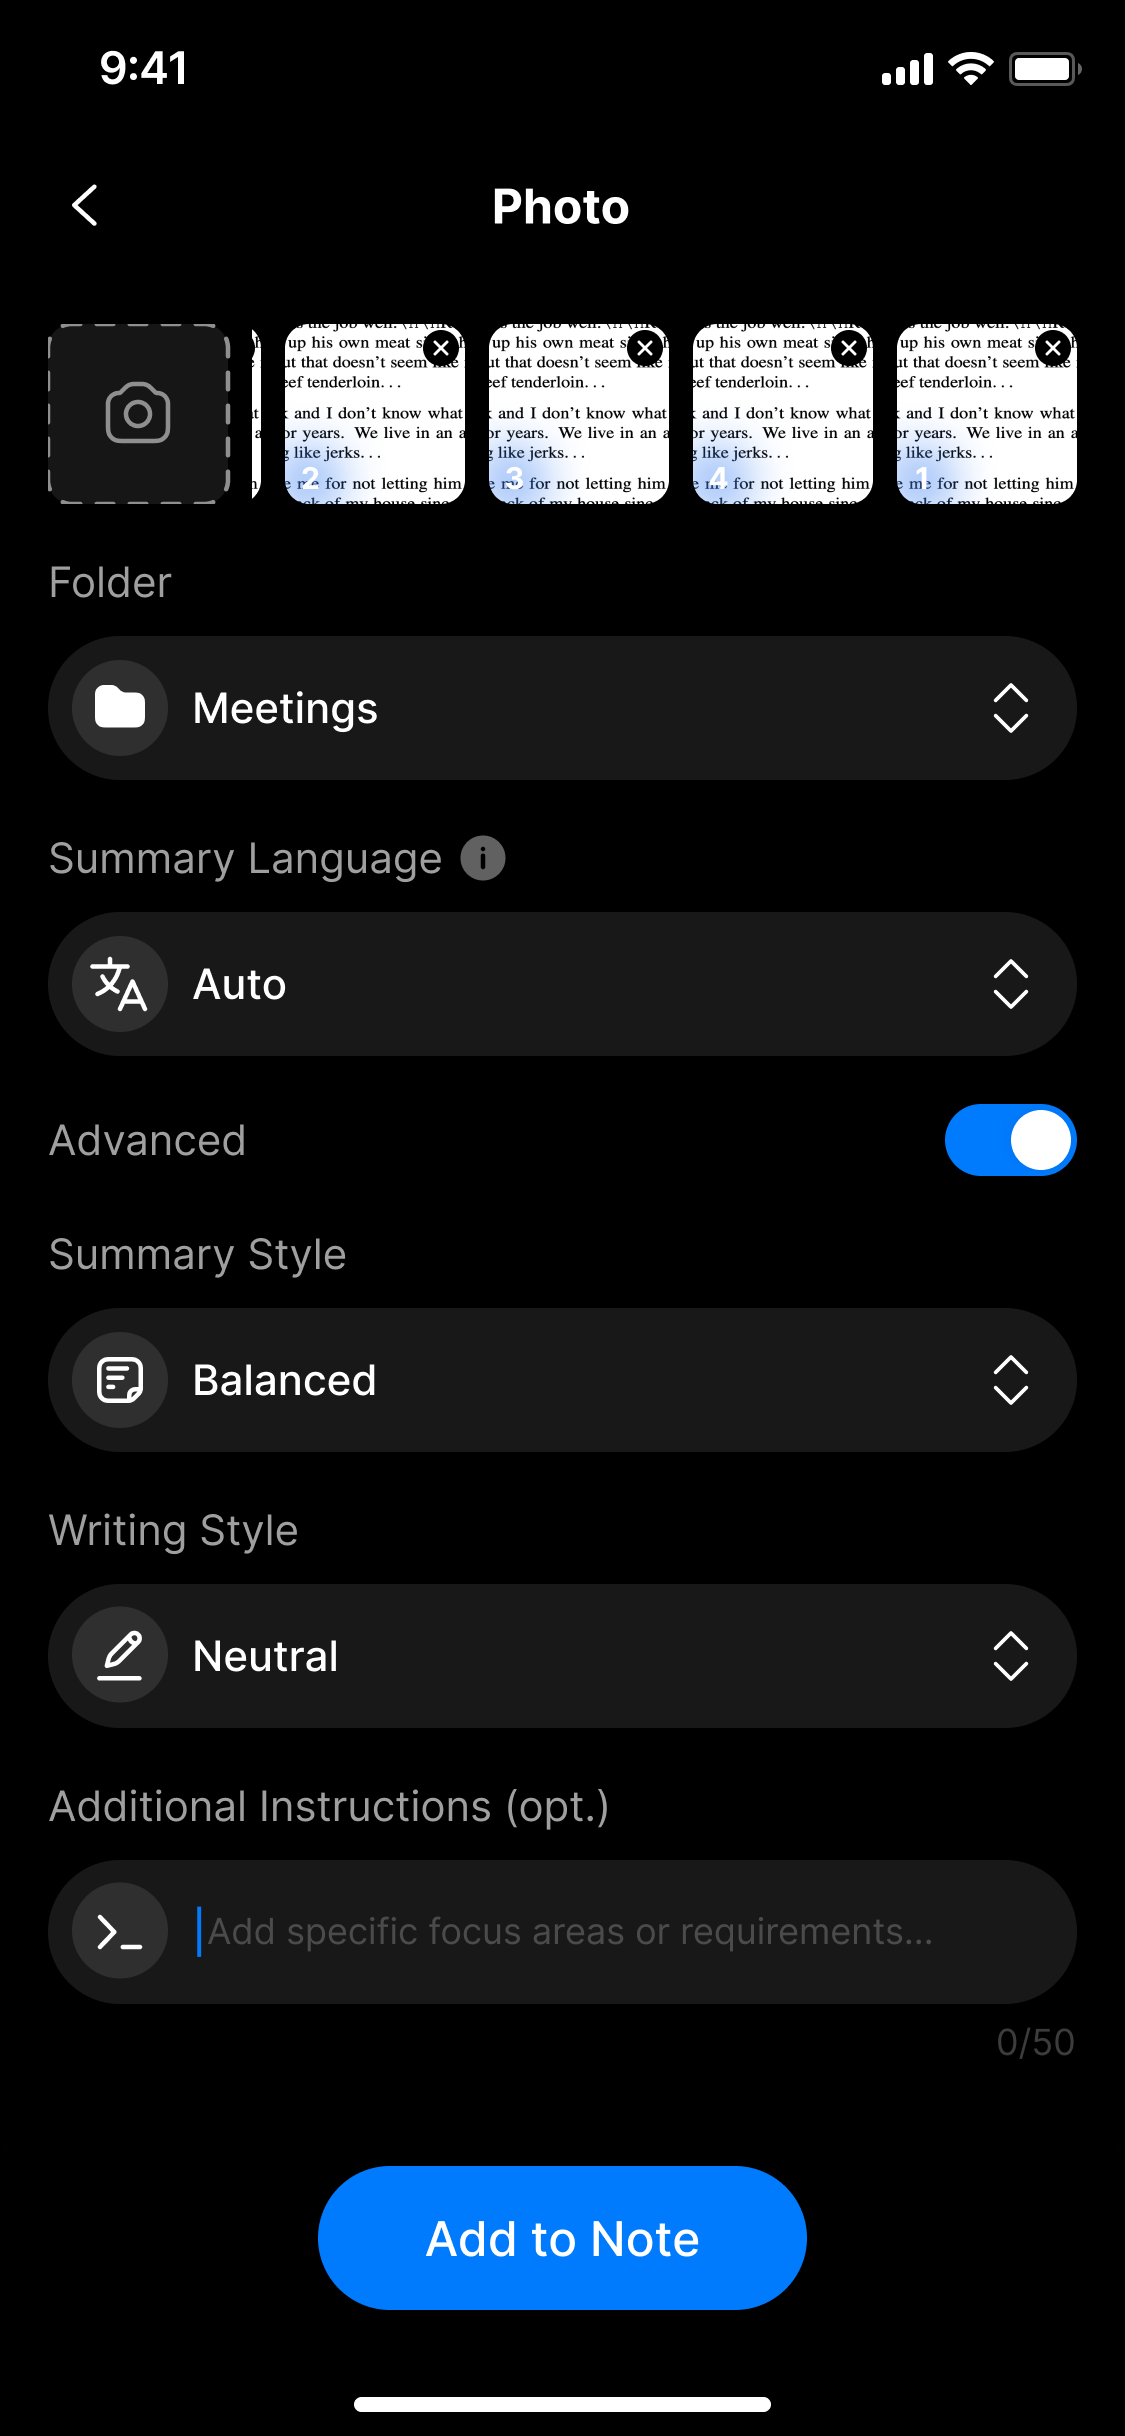
UI specification create take a photo screen
| Component | Type | Description |
|---|---|---|
| Camera view | Camera | Opens camera to capture whiteboards, documents, handwritten notes |
| Captured photo preview | Thumbnail Grid | Displays all selected photos, ready for processing |
| Folder | Dropdown | Selects the folder to store generated notes |
| Summary Language | Dropdown | Choose the image’s language for better OCR accuracy |
| Advanced | Toggle | Enables advanced customization options |
| Summary Style | Dropdown | Choose summary style: Short / Balanced / Detailed |
| Writing Style | Dropdown | Choose tone: Friendly / Neutral / Professional |
| Additional Instructions | Text Input | (Optional) Specific instructions (e.g. “Summarize into bullets”) |
| Add to Note | Button | Sends photos for processing and note creation |
2. How to Use
Step 1: Open the photo feature
From the main screen, select Photo to activate the camera or tap the camera icon if it doesn't launch automatically.
Step 2: Take photos
- Tap the shutter button to capture documents, whiteboards, handwritten notes, etc.
- You can capture up to 10 photos per session
⚠️ If more than 10 images are selected, you’ll see an error:
"You can upload up to 10 images only."
Step 3: Preview & manage images
- Review all captured images in the thumbnail row above
- Tap ❌ to remove unnecessary photos
- Tap on any photo for full-screen view, then rearrange the order if needed
Step 4: Configure settings
- Folder: Choose where the note will be saved
- Summary Language: Match the language used in the image text for best OCR accuracy
🧠 Enable Advanced to access:
- Summary Style: Short / Balanced / Detailed
- Writing Style: Friendly / Neutral / Professional
- Additional Instructions: e.g.,
"Summarize in 5 lines","Highlight key points"
Step 5: Process and generate note
Tap Add to Note to send the image(s) for text extraction and content summarization.
3. Notes & Tips
- Ensure proper lighting to avoid blurry or overexposed images
- Keep your camera steady and aligned for better recognition
- OCR works well with both printed and clear handwritten text
- GIFs or animated images are not supported
- Ideal image size: under 5MB per photo
4. FAQ
How many photos can I capture per session?
You can capture and process up to 10 images per session. If more are needed, split into multiple sessions.
Is selecting the language mandatory?
It’s optional, but selecting the correct language helps improve OCR accuracy.
Can I edit photos after capturing them?
Not directly in-app. However, you can delete and retake any image before submission.
Will blurry photos still be processed?
If an image is too blurry or poorly lit, the system might misread or skip the content.
Can I get markdown or bullet-point summaries?
Yes – simply include it in Additional Instructions, e.g., “Convert to markdown”, “Bullet-point summary”.
Can I reorder the images?
Yes – you can drag to reorder images within the photo preview section.